- Table of Contents
- How a Car Thermal Imaging System Works
- Plan the Installation Before Removing Trim
- Choose the Right Camera Location
- Keep the Camera Near the Vehicle Centerline
- Balance Height With Protection
- Check for Mechanical and Thermal Interference
- Aim the Camera for the Road, Not the Sky
- Route Wiring Safely Through the Vehicle
- Protect Wiring in the Engine Compartment
- Use an Existing Firewall Pass-Through When Possible
- Avoid Airbags and Moving Cabin Parts
- Connect Power Without Creating Electrical Problems
- Choose Switched or Constant Power Deliberately
- Establish a Reliable Ground
- Be Cautious With Modern Vehicle Electronics
- Install the Display Where It Supports Awareness
- Configure Detection and Alert Features Carefully
- Test the System in Stages
- Common Installation Mistakes
- Mounting Behind an Unverified Cover
- Pointing the Camera Too Far Down
- Sharing an Unsuitable Circuit
- Leaving Connectors Exposed
- Obstructing the Driver’s View
- Treating the Display as a Second Windshield
- Skipping Final Calibration
- DIY Installation or Professional Help?
- Maintenance After Installation
- Practical Pre-Drive Checklist
- Frequently Asked Questions
- Where is the best place to mount a car thermal imaging camera?
- Can a thermal camera be installed behind the windshield?
- Can I connect a thermal camera to a cigarette-lighter socket?
- Does the camera need calibration after installation?
- Will thermal imaging work in rain, fog, or snow?
- Does thermal night vision replace headlights?
- Conclusion
A car thermal imaging camera installation requires more than attaching a sensor to the grille and connecting a screen. Camera height, viewing angle, electrical protection, cable routing, display position, and final calibration all affect whether the system provides useful information without distracting the driver. This guide explains how to plan and complete a reliable installation, what common mistakes to avoid, and when professional help is the safer choice.
Table of Contents
How a Car Thermal Imaging System Works
A car thermal imaging camera detects infrared energy emitted by people, animals, vehicles, and other objects. It translates temperature differences into an image that can help a driver notice potential hazards beyond the useful reach of ordinary visible-light cameras in some nighttime or poor-visibility conditions.
Unlike a conventional dash camera, a thermal camera does not depend primarily on street lighting or reflected headlight illumination. That can make it useful on dark rural roads, unlit highways, and routes where pedestrians or animals may be difficult to distinguish from the background.
A typical car thermal imaging camera system includes:
- A forward-facing thermal camera
- A wiring harness and power connection
- A dashboard display or compatible interface
- Mounting hardware
- Control, recording, or alert components, depending on the system
- Installation and calibration instructions
Some systems add software-based pedestrian, animal, or vehicle recognition and real-time warnings. These features make accurate positioning especially important because the recognition area must correspond reasonably well with the road ahead.
Thermal night vision remains driver-assistance technology. It does not replace headlights, mirrors, proper speed, adequate braking distance, windshield visibility, traffic-law compliance, or continuous attention to the road.
Plan the Installation Before Removing Trim
The most reliable car thermal imaging camera installations begin with a complete layout. Before drilling, cutting, or connecting power, identify where every component will sit and how the wiring will travel between them.
Read the manufacturer’s instructions in full. Confirm the system’s voltage requirements, fuse recommendations, mounting limitations, operating temperature range, connector orientation, and calibration procedure. Vehicle-specific instructions take priority over general advice.
Then perform a temporary layout:
- Hold the camera near the proposed mounting location.
- Trace the intended cable route through the engine compartment.
- Identify an existing firewall pass-through where possible.
- Place the display in its proposed position.
- Check sightlines from the normal driving position.
- Confirm that cables and connectors reach without tension.
- Identify the correct protected power and ground points.
This dry fit often reveals car thermal imaging camera installation problems that are inconvenient to solve after trim has been removed. A display cable may be too short, the camera bracket may interfere with grille shutters, or the planned firewall route may be inaccessible from the cabin.
It is also worth checking whether the installation could affect the vehicle’s warranty, leased-vehicle terms, insurance requirements, or local rules concerning dashboard displays and windshield obstructions. Requirements differ by jurisdiction. The National Highway Traffic Safety Administration’s distracted-driving guidance provides useful context for minimizing visual and manual distractions.
For a broader overview of product selection before installation, consult this car thermal night vision system buying guide for drivers.
Choose the Right Camera Location
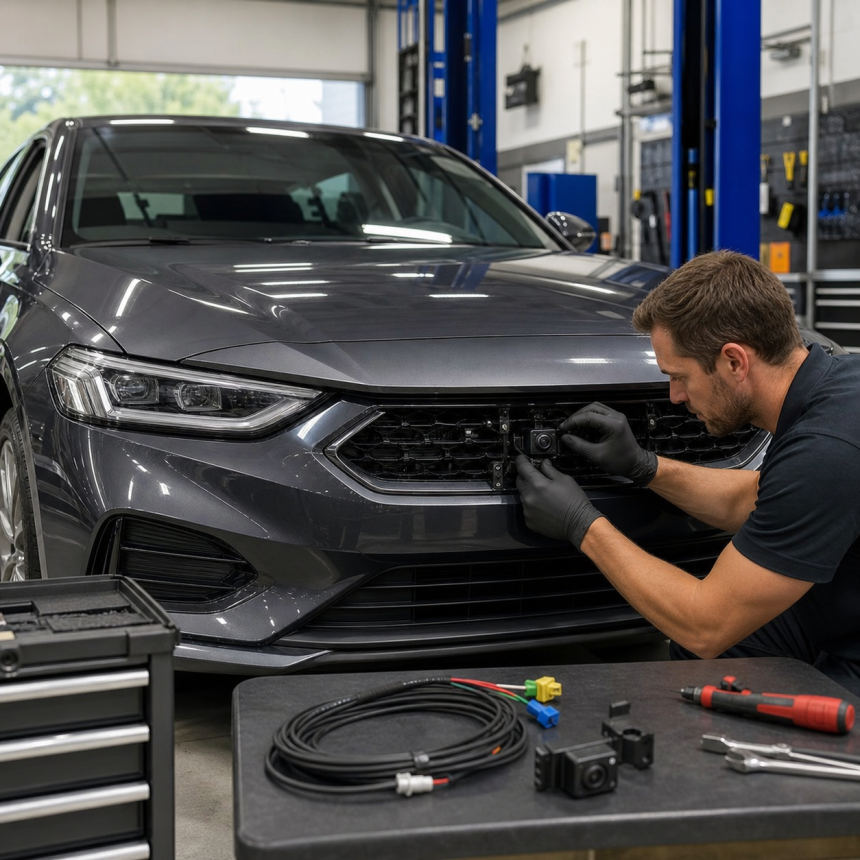
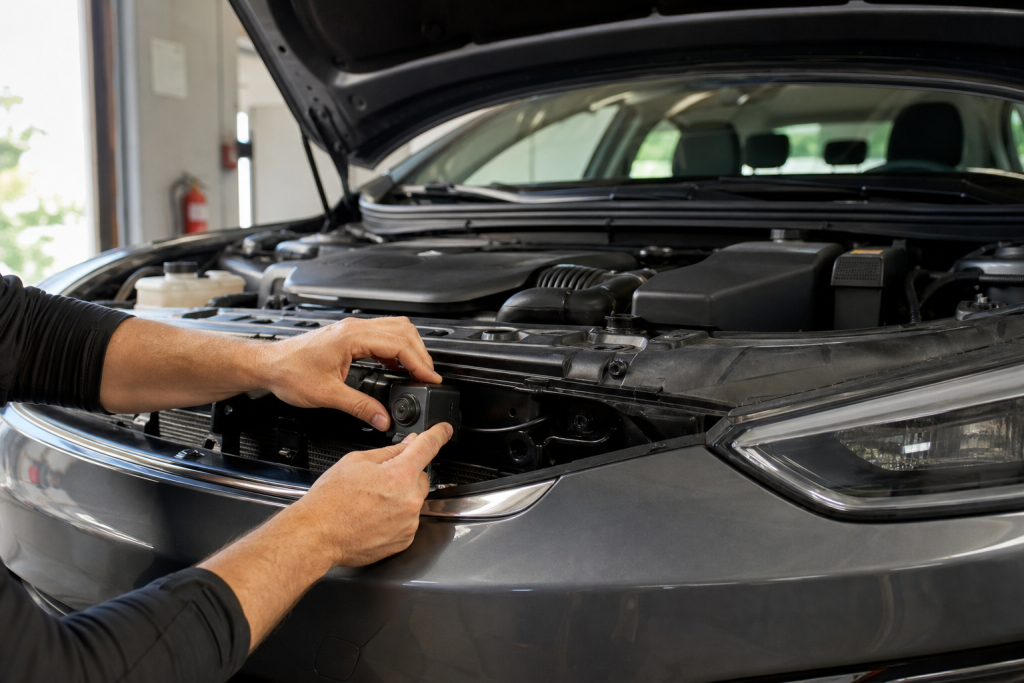
Placement determines how useful a car thermal imaging camera will be. The ideal position usually provides a centered, forward-facing view with minimal obstruction and limited exposure to direct road debris.
Keep the Camera Near the Vehicle Centerline
Mounting a car thermal imaging camera close to the horizontal center of the vehicle helps align the image with the driver’s direction of travel. A camera positioned far to one side can create a noticeably offset perspective, particularly on narrow roads or when judging whether a detected object is in the vehicle’s path.
Suitable locations may include:
- The center grille area
- A reinforced position behind a compatible grille opening
- The lower bumper area, if ground clearance remains adequate
- A manufacturer-approved bracket near the front emblem
- A dedicated mount above or below the license plate, where legal and unobstructed
Do not automatically assume that mounting a car thermal imaging camera behind any plastic panel will work. Materials that appear transparent to visible light may block or weaken thermal infrared energy. Unless the system documentation specifically approves behind-panel installation, the sensor should have an unobstructed thermal view.
Balance Height With Protection
A higher mounting position can give a car thermal imaging camera a more natural road perspective and reduce the amount of pavement dominating the image. A very low position may expose the camera to standing water, stones, snow buildup, road salt, parking curbs, and steep driveway transitions.
However, mounting too high can create other problems. The hood may enter the field of view, installation may require permanent body modifications, and the viewing angle may not match the system’s recognition software.
Follow the specified mounting-height range when one is provided. If the documentation does not provide a universal measurement, use the supplied bracket and intended mounting geometry instead of improvising an extreme location.
Check for Mechanical and Thermal Interference
The car thermal imaging camera and its cable must remain clear of:
- Radiators and hot coolant hoses
- Exhaust or turbocharger components
- Cooling fans and drive belts
- Active grille shutters
- Hood-latch mechanisms
- Parking sensors and radar modules
- Tow-hook access points
- Airbag impact sensors
- Areas used for vehicle lifting or recovery
- Sharp metal edges
Heat sources near the sensor can affect reliability even when they do not appear in the image. Moving parts can damage a cable gradually through vibration or abrasion.
The camera also should not obstruct cooling airflow or interfere with factory driver-assistance sensors. Modern bumpers and grilles may contain radar, parking sensors, front cameras, or calibration-sensitive brackets that are not obvious from the outside.
Aim the Camera for the Road, Not the Sky
A car thermal imaging camera must be level enough to show the useful roadway while preserving detection distance. If it points too low, the display will contain excessive pavement and nearby heat patterns. If it points too high, the system may miss objects closer to the vehicle or show too much sky.
Begin with the camera centered and approximately level according to the manufacturer’s reference marks. Tighten the bracket enough to hold its position but leave room for adjustment during testing.
Use a straight, level road or a large private area for initial alignment. The image should normally show:
- The road ahead centered in the frame
- Both roadside areas without a severe left or right bias
- Enough foreground to understand the immediate path
- Useful distance without excessive sky
- A level horizon on flat ground
Do not use image appearance alone if the car thermal imaging camera provides a formal calibration process. Recognition zones and alerts may depend on software settings such as camera height, vehicle width, horizon position, or mounting offset.
After alignment, tighten all fasteners to the specified torque. Thread-locking products should be used only when allowed by the camera or bracket manufacturer, as some compounds can damage plastics or make future service difficult.
Route Wiring Safely Through the Vehicle
Wiring for a car thermal imaging camera is not merely cosmetic. Poorly secured wiring can cause intermittent images, electrical faults, water intrusion, rattles, and damage to factory systems.
Protect Wiring in the Engine Compartment
Follow existing factory harnesses where practical, but do not fasten the car thermal imaging camera cable so tightly that either harness is compressed. Use suitable automotive cable protection in exposed areas and secure the route at regular intervals.
Maintain slack for normal engine movement where the cable passes near components mounted on the powertrain. At the same time, avoid loose loops that can reach fans, belts, or hot surfaces.
Where a cable passes through metal, use an appropriate grommet. An unprotected drilled hole can cut through insulation over time. Seal any new penetration using an automotive method compatible with the surrounding material, but do not block designed drainage paths.
Position connectors so water cannot collect around them. Even weather-resistant connectors benefit from sensible placement, strain relief, and protection from direct pressure washing. Do not rely on ordinary household electrical tape as the primary weather seal in the engine compartment.
Use an Existing Firewall Pass-Through When Possible
The firewall separates the engine compartment from the passenger cabin and may contain wiring, insulation, HVAC components, and safety systems. An existing unused grommet or manufacturer-approved pass-through is generally preferable for a car thermal imaging camera cable.
Before using a shared grommet, check both sides. Do not puncture a location blindly because wiring may sit directly behind it. Restore the seal around the cable to prevent water, fumes, noise, and heat from entering the cabin.
If a new firewall opening is unavoidable, professional installation is usually the prudent choice. Selecting a safe location requires knowledge of the vehicle’s structure and hidden components.
Avoid Airbags and Moving Cabin Parts
Cabin wiring for a car thermal imaging camera should not cross deployment paths for knee, curtain, dashboard, or seat-mounted airbags. Tucking a wire behind a trim panel without checking the airbag layout can create a serious hazard.
Keep the cable away from:
- Steering-column joints and adjustment mechanisms
- Pedals and pedal brackets
- Seat tracks
- Glove-box hinges
- HVAC doors and linkages
- Sharp trim clips
- Airbag modules and deployment seams
Use proper non-marring trim tools and replace broken clips rather than forcing panels back into place. A neat-looking installation is not necessarily a safe one if a cable is pinched behind the trim.
Connect Power Without Creating Electrical Problems
A car thermal imaging camera needs stable, correctly fused power. Exact connection requirements vary, so follow the supplied wiring diagram rather than relying on wire color alone.
Choose Switched or Constant Power Deliberately
Switched accessory power turns the car thermal imaging camera off with the vehicle and reduces the risk of battery drain. Constant power may support parking or recording functions on compatible systems, but it requires appropriate low-voltage protection and careful consideration of battery condition.
Use a verified circuit and test it in all relevant ignition states. Some modern vehicles keep accessory circuits active temporarily after shutdown, while others use pulse-width modulation or electronic monitoring that can cause unexpected behavior.
A fuse-tap adapter can be useful when it is permitted and installed correctly. The original circuit must retain the correct fuse rating, and the added circuit needs its own fuse sized according to the device manufacturer’s instructions. Do not replace a fuse with a higher rating to accommodate the camera.
Establish a Reliable Ground
A poor ground can cause a car thermal imaging camera to flicker, reboot, display image noise, or operate intermittently. Use an approved chassis ground point where possible. The terminal should make secure electrical contact and should not interfere with safety-critical fasteners.
Do not attach a ground wire to airbag hardware, steering components, or a random painted screw. Avoid drilling into the body unless the area behind the panel is fully known and the new connection can be protected from corrosion.
Be Cautious With Modern Vehicle Electronics
Late-model vehicles may use sensitive body-control modules, monitored circuits, hybrid or high-voltage systems, and complex data networks. A car thermal imaging camera should never be connected by splicing into CAN bus wiring or probing unfamiliar connectors.
Electric and hybrid vehicles require additional caution. The thermal camera’s low-voltage supply does not justify working near orange high-voltage cables or components. If the correct accessory circuit cannot be identified confidently, use a qualified automotive electrician or installer with model-specific information.
Disconnecting the battery is not always a simple universal precaution. It may affect security systems, windows, steering-angle calibration, infotainment settings, or other learned values. Follow the vehicle manufacturer’s service procedure.
Install the Display Where It Supports Awareness
A useful car thermal imaging camera display must be visible with a brief glance but should not block the windshield, mirrors, instruments, or road view. It also should not encourage the driver to stare at the screen.
Common mounting areas include the top of the dashboard near the driver’s forward sightline, a suitable center-dash position, or another manufacturer-approved location. Local restrictions may limit windshield-mounted devices or define acceptable obstruction zones.
Before applying adhesive or drilling:
- Sit in the normal driving position.
- Adjust the steering wheel and seat.
- Check the view through the entire windshield.
- Confirm access to vehicle controls.
- Check whether the display reflects in the glass at night.
- Verify that passengers cannot easily strike it.
- Confirm that no airbag deploys through the mounting area.
Set the car thermal imaging camera screen brightness low enough to preserve night vision while keeping hazards readable. An overly bright display can reduce the driver’s ability to see the road outside. If the device provides automatic dimming, test its behavior in daylight, tunnels, and nighttime conditions.
Secure the display cable so it cannot hang near the steering wheel, gear selector, or pedals. Leave enough service slack to remove the screen without pulling on its connector.
Configure Detection and Alert Features Carefully
A car thermal imaging camera that recognizes pedestrians, animals, vehicles, or obstacles may need more setup than a video-only camera. Configuration can include vehicle type, camera height, mounting offset, road orientation, alert volume, detection zones, or warning sensitivity.
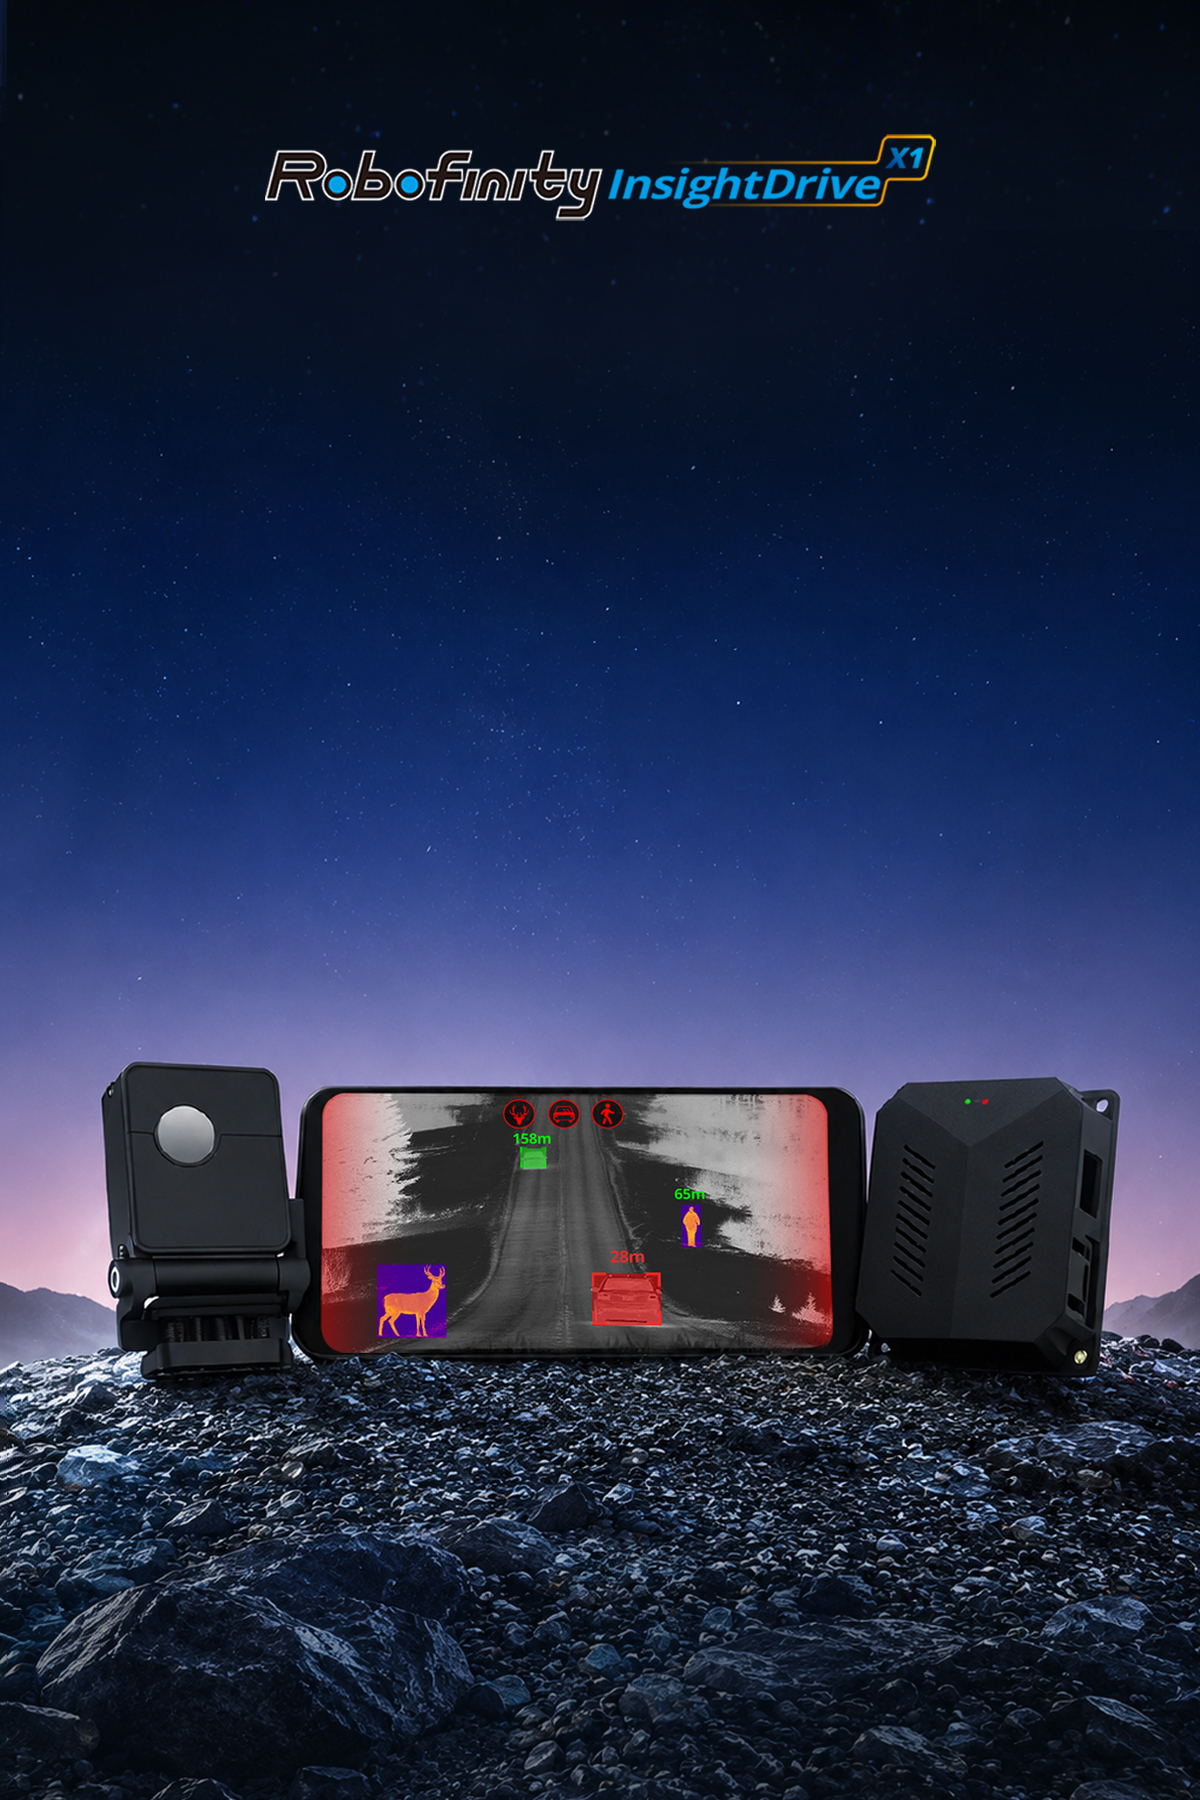
Robofinity InsightDrive is one example of a vehicle thermal night vision system that uses AI-powered thermal imaging to support recognition of pedestrians, animals, and vehicles. As with any recognition-based car thermal imaging camera, its installation should follow the product-specific positioning and setup instructions so the displayed scene and alerts correspond as closely as possible to the road ahead.
Do not set alert volume so high that it startles the driver. Conversely, an alert that cannot be heard over ordinary cabin noise is not useful. Test the warning level with the ventilation fan, audio system, and normal road noise present.
Sensitivity also involves a trade-off. Excessive sensitivity may produce frequent warnings for objects outside the travel path, while a setting that is too restrictive may provide less notice. Start with the recommended configuration and change it only after controlled testing and careful observation.
Test the System in Stages
A complete car thermal imaging camera installation should be tested before all trim is reassembled and again after the vehicle returns to normal use.
Perform a Stationary Check
With the vehicle parked safely, test the car thermal imaging camera as follows:
- Confirm that the system powers on and off as intended.
- Check the display for a stable image.
- Verify that connectors remain secure when cables are moved gently.
- Test screen brightness and menus.
- Confirm that the camera view is centered.
- Check for diagnostic warning lights on the vehicle.
- Test alert audio at a reasonable level.
If the image is missing or unstable, stop and inspect power, ground, connectors, and fuse orientation. Do not complete the trim installation until the cause is resolved.
Conduct a Controlled Road Test
Begin in daylight on familiar roads to evaluate car thermal imaging camera vibration, image stability, and display placement. Listen for rattles and confirm that the screen remains secure over bumps.
Night testing should take place under safe conditions at conservative speeds. Use normal headlights and all standard driving practices. Check whether the thermal image is understandable without requiring long glances away from the road.
Evaluate several relevant environments:
- A dark rural road with roadside vegetation
- A divided highway with oncoming headlight glare
- A residential area with pedestrians and parked vehicles
- Light rain or mist, when conditions permit safe travel
- Curving and hilly roads
- Urban traffic with many warm objects and visual distractions
Thermal imaging can support road awareness, but performance can vary with weather, object temperature, mounting cleanliness, and environmental conditions. Heavy precipitation, road spray, ice, mud, or snow on the lens can reduce practical usefulness.
Recheck After the First Trips
Vibration and temperature changes can reveal car thermal imaging camera problems that a stationary test misses. After several trips, inspect:
- Camera alignment
- Bracket tightness
- Cable abrasion
- Connector security
- Fuse and power behavior
- Display stability
- Water entry around pass-throughs
- Unusual battery drain
Repeat these checks periodically and after bumper work, collision repair, grille removal, or any event that could disturb the camera.
Common Installation Mistakes
Several errors repeatedly undermine an otherwise capable car thermal imaging camera.
Mounting Behind an Unverified Cover
A grille insert or emblem may look transparent but block thermal energy. Confirm material compatibility rather than assuming the camera can see through it.
Pointing the Camera Too Far Down
An overly low angle fills the display with road surface and limits useful forward awareness. Start level and use the formal calibration procedure.
Sharing an Unsuitable Circuit
Selecting power based only on convenience can cause shutdowns, battery drain, blown fuses, or electronic faults. Verify the circuit and protect the added device separately.
Leaving Connectors Exposed
A connector hanging low behind the bumper can collect water and road contamination. Secure it above likely splash zones without placing it near heat or moving mechanisms.
Obstructing the Driver’s View
A screen installed directly in the windshield sightline can create a larger safety problem than the technology is intended to address. Test the location from the actual driving position before fixing it permanently.
Treating the Display as a Second Windshield
Thermal images do not show every road detail. Lane markings, signs, traffic-signal colors, surface defects, and cold objects may not appear as expected. The road remains the driver’s primary visual reference.
Skipping Final Calibration
A car thermal imaging camera can produce a clear image while still being poorly aligned for recognition or alerts. Complete every required setup step after the physical installation.
DIY Installation or Professional Help?
A careful owner may be able to install a straightforward car thermal imaging camera when the vehicle has accessible low-voltage power, a suitable firewall pass-through, removable trim, and an uncomplicated mounting point. Basic competence with a multimeter, crimping, fuse protection, trim removal, and weatherproof cable routing is important.
Professional help is advisable when:
- The bumper or grille must be removed
- Drilling into the body or firewall is required
- The vehicle has hybrid or high-voltage components near the work area
- Factory radar, cameras, or parking sensors could be affected
- Airbag-equipped trim must be removed
- The electrical system uses monitored or unfamiliar circuits
- The device requires specialized calibration
- The vehicle is leased or under warranty
- A clean, reversible installation is a priority
A professional car thermal imaging camera installer should receive the complete product documentation, not just the hardware. Ask for confirmation of the power source, fuse location, grounding point, cable path, sealing method, and calibration process. Retain photos and documentation for future troubleshooting or vehicle resale.
Maintenance After Installation
A car thermal imaging camera requires little routine attention, but it is not maintenance-free. Inspect the front lens regularly and clean it using the method approved by the manufacturer. Abrasive cloths, aggressive chemicals, or high-pressure spray at close range may damage protective surfaces or seals.
Check the image before a long nighttime trip. A lens covered with road salt, insects, ice, or mud can significantly reduce clarity. If the view suddenly changes, inspect the physical camera before assuming there is a software fault.
Warning signs that a car thermal imaging camera needs inspection include:
- A tilted or shifted horizon
- Flickering or intermittent video
- Repeated unexpected restarts
- Alerts that no longer match the road scene
- Moisture visible inside the camera housing
- A loose display or camera bracket
- New battery-drain symptoms
- Blown fuses
- Vehicle warning messages after installation
Do not repeatedly replace a blown fuse. A recurring failure indicates a circuit, wiring, connector, or device fault that must be diagnosed.
Practical Pre-Drive Checklist
Before relying on a car thermal imaging camera during low-light driving, confirm that:
- The lens is clean and unobstructed.
- The camera bracket is secure.
- The image is level and centered.
- The display does not obstruct the road view.
- Screen brightness is appropriate for darkness.
- Alerts are audible but not startling.
- No vehicle warning lights are present.
- Headlights, mirrors, windshield, and wipers are in proper condition.
- Speed and following distance match the visibility and road conditions.
This final point matters most. A thermal camera may provide additional information, but it cannot create braking distance or compensate for excessive speed.
Frequently Asked Questions
Where is the best place to mount a car thermal imaging camera?
The best location for a car thermal imaging camera is generally near the vehicle’s centerline, high enough to provide a useful forward view but protected from impacts, water, and debris. It must not be blocked by materials that prevent thermal transmission or interfere with factory sensors.
Can a thermal camera be installed behind the windshield?
Only if the manufacturer explicitly supports that configuration. Standard automotive glass commonly blocks the thermal infrared wavelengths used by many long-wave thermal cameras, so a camera placed behind the windshield may not function correctly.
Can I connect a thermal camera to a cigarette-lighter socket?
Some systems may support an accessory-socket connection, but only when specified by the manufacturer. It is less integrated than hardwiring and can leave exposed cables. Confirm voltage, current capacity, fuse protection, and whether the socket shuts off with the vehicle.
Does the camera need calibration after installation?
Many systems require alignment, while a recognition-based car thermal imaging camera may also require software calibration. Complete the manufacturer’s procedure even when the video image appears clear and centered.
Will thermal imaging work in rain, fog, or snow?
Thermal imaging may remain useful in some poor-visibility conditions, but performance is not unlimited. Heavy precipitation, accumulated ice or snow, water spray, a dirty lens, and reduced thermal contrast can degrade the image or detection capability.
Does thermal night vision replace headlights?
No. Headlights are essential for illuminating signs, markings, road surfaces, and many objects that may not stand out thermally. A thermal camera is a supplementary awareness tool, not a substitute for required lighting or attentive driving.
Conclusion
A successful car thermal imaging camera installation depends on a clear forward view, secure mounting, protected wiring, correct fuse and ground selection, an unobtrusive display, and careful calibration. Planning the complete installation before modifying the vehicle prevents many of the most common electrical and visibility problems.
After installation, test the car thermal imaging camera gradually, recheck it after several trips, and keep the lens and mounting hardware in good condition. Most importantly, use thermal imaging as an additional source of information. Safe speed, properly maintained headlights, sufficient following distance, and attention to the road remain the foundation of nighttime road safety.